
 English
Views: 0 Author: Site Editor Publish Time: 2026-08-19 Origin: Site

Construction projects globally fight a daily battle against rising labor rates. They also face impossibly tight deadlines. Traditional masonry simply cannot keep pace anymore. Today, Autoclaved Lightweight Concrete is rapidly replacing conventional brick in modern builds. Developers and builders face a tough choice. You must balance the initial price of new materials against substantial long-term operational savings. Reducing structural load matters. Saving hundreds of labor hours matters. Cutting energy waste is crucial for a successful build.
We will break down the exact benefits of this modern material objectively. You will also get a transparent look at the step-by-step installation process. By the end, contractors can confidently assess project viability. You will be ready to implement better building strategies and streamline your next commercial or residential development.
ALC panels reduce structural dead loads by up to 60% compared to standard brickwork, lowering foundational costs.
Integrating an acoustic resistance ALC panel system meets stringent commercial privacy compliances while acting as a thermal barrier.
Installation requires specific, non-negotiable leveling and jointing techniques; failure here compromises the entire wall system.
The true ROI of ALC emerges from accelerated construction speed (up to 3x faster than blockwork) and reduced finishing trades.
Wet trades create massive bottlenecks on any job site. Traditional bricklaying and heavy plastering add weeks to project timelines. These constant delays increase holding costs significantly. You need a better way to build. Evaluating wall materials requires strict success criteria. We look at labor hours per square meter first. We measure structural weight reduction next. We also carefully verify compliance for thermal and fire regulations.
Here is where the ALC Panel truly shines. It functions as an incredibly efficient all-in-one partition. It also acts as a reliable load-bearing substitute when engineered correctly. This material bridges the gap perfectly for modern developers. It replaces heavy, labor-intensive masonry effortlessly. It also outperforms flimsy, hollow drywall assemblies. You get the solid, durable feel of traditional blockwork. However, you install it at the rapid speed of drylining.
Project managers often struggle to coordinate multiple finishing trades. Masonry requires bricklayers, renderers, and plasterers to sequence their work perfectly. Any delay from one trade derails the entire schedule. Moving away from wet trades eliminates this sequencing nightmare. Your framing and installation crews can enclose rooms faster. This early enclosure allows electrical and plumbing rough-ins to begin weeks ahead of a traditional schedule.
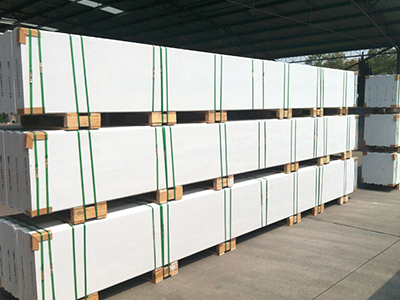
Time is the most expensive commodity on a construction site. One large aerated panel often equals the surface area of dozens of standard bricks. You eliminate mixing heavy wet mortar entirely. You save countless labor hours per floor. Teams can install these large formats up to three times faster than laying blocks. A standard crew can often enclose massive commercial floor plans in a matter of days.
The manufacturing process creates a unique aerated structure. This concrete matrix contains millions of microscopic air bubbles. This drastically reduces the dead load on your building foundation. Engineers can safely downsize structural steel requirements. They can also specify thinner concrete slabs. Lighter buildings ultimately cost less to construct. You spend less money on raw structural support materials.
Those same microscopic air bubbles do more than cut weight. The cellular structure traps air highly effectively. This acts as a powerful, continuous thermal break. It prevents rapid heat transfer through the building envelope. Your interiors stay warmer in winter and cooler in summer. You reduce HVAC operational loads significantly over the building's lifespan. This helps buildings achieve superior energy efficiency ratings.
Noise transfer ruins commercial and residential privacy. Thin walls lead to constant tenant complaints. A high-density acoustic resistance ALC panel blocks sound transmission beautifully. It delivers highly verifiable decibel reductions across different frequencies. This ensures your project easily meets stringent multi-residential privacy standards. You achieve peace and quiet without building double-stud framing or adding expensive acoustic batting.
Life safety is always non-negotiable in construction. Aerated concrete is entirely non-combustible. It provides excellent, predictable fire rating hours natively. Depending on thickness, a wall can easily offer up to four hours of fire resistance. You achieve this vital protection naturally. You do not need to rely on added chemical retardant treatments or extra layers of fire-rated drywall.
Factory manufacturing tolerances are incredibly tight. These wall units arrive on site perfectly straight and uniformly thick. This precision completely eliminates the need for thick traditional plastering. The wall surface is exceptionally smooth right after installation. It is immediately ready for a simple skim coat. You bypass the messy, slow rendering process entirely.
Modern developers prioritize sustainable building practices. Production requires significantly less energy than traditional dense concrete. The manufacturing process creates a considerably lower carbon footprint. Furthermore, exact-cut sizing minimizes on-site offcuts. You generate very little debris during installation. You send far less waste to the local landfill, keeping disposal costs low.
Proper site readiness dictates your entire installation success. You must check floor slab leveling tolerances carefully before starting. Crews should sweep and vacuum the concrete slab before panel deployment. Debris trapped under the base track will ruin your baseline alignment. A perfectly clean, level starting point ensures the entire wall goes up plumb and true.
Having the correct equipment on hand is equally critical. Attempting to lift or cut this material with improper tools causes damage and slows down the workflow. Below is the essential tooling list you need for a successful installation:
Mechanical lifting equipment, including specialized panel lifters or motorized winches.
Calibrated laser levels and high-quality weighted plumb bobs.
ALC-specific hand saws or heavy-duty circular saws with appropriate masonry blades.
Notched trowels designed specifically for thin-bed adhesive applications.
You must never substitute specific thin-bed adhesive for standard masonry mortar. The chemistry is completely different. Material staging also requires careful planning. Practice safe handling to prevent chipping edges prior to installation. Store your inventory flat on sturdy pallets. Keep the units securely wrapped and dry until you are absolutely ready to build. Moisture absorption before installation can complicate the adhesive curing process.
You cannot build a straight wall on a crooked floor. Apply the Damp Proof Course (DPC) first to prevent rising moisture. Next, lay a specialized leveling mortar bed for the initial row. This base layer compensates for minor slab unevenness. Take your time here. A perfectly level base guarantees the rest of the wall assembles quickly and accurately.
Bring the material to the installation line using mechanical lifts safely. Critical alignment relies heavily on your laser levels. The accuracy of panel number one dictates the entire wall's structural success. Check for plumb on both the face and the edge. Do not rush this step. Secure it temporarily while the base mortar begins to grab.
Mix your adhesive precisely to the manufacturer's correct consistency. Apply it generously using a notched trowel on the vertical joints. Full, consistent coverage is absolutely mandatory for structural integrity. The adhesive must squeeze out slightly when the next unit connects. This visual cue confirms you have eliminated any hidden air pockets in the joint.
Slide subsequent panels into place carefully. Most modern systems feature precision tongue and groove edges. Tap them gently into final alignment using heavy rubber mallets. You want extremely tight, flush joints. A tight connection maximizes thermal performance and acoustic isolation. Wipe away any excess adhesive immediately before it hardens.
Deflection will happen in any multi-story building. Concrete slabs move, shrink, and settle over time. Install specific L-brackets or U-channels at the ceiling and floor slabs. These metal anchors hold the wall securely in place. Crucially, they accommodate natural structural movement safely without transferring crushing loads directly onto the wall.
You must prevent micro-cracking between installed units as the building settles. Apply durable fiberglass mesh tape over every single vertical joint. Embed this tape smoothly using a high-quality jointing compound. Feather the edges out carefully with a wide taping knife. Once sanded, the joints become invisible, leaving a flawless, monolithic wall surface ready for painting.
Mistakes happen quickly when contractors ignore established manufacturer guidelines. The most common failure involves ignoring deflection allowances. Slabs move and settle continuously over time. Do not wedge panels tightly against the upper ceiling slab. You must leave a designated gap at the top. Fill this expansion space using flexible PU foam or fire-rated acoustic sealant. Rigid, tight connections will eventually cause terrible, spider-web cracking across your finished walls.
Another major risk is mixing an incorrect adhesive. Some inexperienced crews try using traditional cement or standard brick mortar to save money. You must use polymer-modified thin-bed adhesive explicitly designed for aerated concrete. Traditional mortar leads to catastrophic bond failure because it dries out too quickly. It also creates severe acoustic leakage through the weakened joints, destroying your sound privacy goals.
Finally, poor wet area specification ruins bathroom installations. Aerated concrete resists moisture degradation naturally. It does not rot or host mold easily. However, it is not inherently waterproof on its own. You must apply proper liquid waterproofing membranes over the walls in showers and bathrooms. Treat exterior-facing walls similarly before tiling or applying exterior cladding. Skipping the waterproofing membrane guarantees structural damage down the road.
Evaluating cost versus true value requires looking past the initial invoice. Initial material costs for aerated options might seem slightly higher than standard drywall. However, you must calculate substantial downstream savings. You save massive amounts of money on accelerated labor. You eliminate heavy, wet plastering entirely. You also reduce foundational concrete and structural steel due to the lighter building weight.
Shortlisting logic helps you make the right material call. Choose aerated panels for medium to large-scale commercial and residential projects. Ensure you have the physical space for lifting equipment. Choose them over standard drywall when you need severe impact durability, high security, and exceptional acoustic ratings between tenancies.
Feature Category | Aerated Concrete Panels | Traditional Brickwork | Standard Drywall (Studs) |
|---|---|---|---|
Installation Speed | Very Fast (Large surface area) | Slow (Labor-intensive wet trade) | Fast (Requires multiple finishing coats) |
Structural Weight | Lightweight (Reduces foundation load) | Very Heavy (Requires robust footings) | Very Lightweight (Minimal structural impact) |
Acoustic Performance | Excellent (High mass, dampens sound) | Good (High mass, prone to flanking) | Poor (Requires acoustic batts/double layers) |
Finishing Required | Minimal (Skim coat ready) | Extensive (Thick render & plaster) | Moderate (Taping, mudding, sanding) |
How do you audit a potential supplier to ensure you get top-tier materials? Never buy based on price alone. Poor quality aerated concrete crumbles easily and lacks proper structural reinforcement. Follow these specific steps to protect your project:
Request comprehensive technical data sheets outlining compressive strength and density for all products.
Demand certified fire test reports conducted by recognized, independent testing laboratories.
Ask for recent acoustic rating lab reports matching your exact proposed wall assembly.
The final verdict for modern construction is incredibly clear. These advanced wall systems represent a high-ROI material choice for forward-thinking developers. They perfectly suit projects prioritizing rapid installation speed and significantly reduced structural loads. They also deliver unmatched long-term thermal efficiency and superior acoustic performance. You no longer have to compromise between durability and speed.
Stop letting slow wet trades dictate your critical project schedule. You can take immediate action today to modernize your workflow. Calculate your upcoming project's total interior and exterior wall area. Reach out to a certified manufacturer to request a physical sample for your engineering team. Get a localized, detailed quote to establish your new, highly efficient cost baseline.
A: Yes, they can absolutely support structural loads. However, you must differentiate between standard partition panels and engineered structural panels. Load-bearing applications always require specific internal steel reinforcement profiles inside the concrete matrix. You must obtain formal sign-off from a licensed structural engineer before using them to support heavy roof or upper-floor loads.
A: It is a common myth that aerated concrete cannot hold weight. You simply need the right hardware. Always use specialized expanding anchors or heavy-duty toggle bolts designed for aerated material. These anchors expand deep within the cellular structure. They distribute the load safely, allowing you to easily and securely mount heavy cabinetry, shelving, or televisions.
A: Yes, they perform exceptionally well in wet zones. The material itself resists moisture degradation and mold growth natively. However, they are not inherently waterproof. You must apply a standard liquid waterproofing membrane directly over the panel surface. Once the membrane cures fully, you can safely apply tile adhesive and heavy ceramic tiles.


